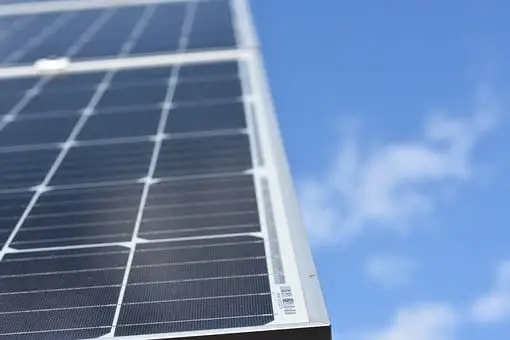
Are you an avid camper looking to harness the power of the sun for your RV adventures? Look no further! In this guide, we’ll provide you with everything you need to know to install solar panels on your RV. From selecting the right equipment to the final wiring touches, we’ve got you covered.
Why Install Solar Panels on Your RV?
The benefits of installing solar panels on your RV are hard to ignore. Here are just a few reasons why campers are increasingly turning to solar power for their RVs:
- Reduce or eliminate the need for noisy generators
- Lessen your environmental impact
- Save money on fuel costs
- Extend the life of your RV’s batteries
- Gain energy independence
What You’ll Need
To get started with your solar installation, you’ll need the following components:
- Solar panels: Choose between monocrystalline and polycrystalline panels, depending on your budget and efficiency needs.
- Charge controller: This regulates the flow of energy from the solar panels to the battery bank. Learn more about MPPT and PWM controllers.
- Battery bank: This stores the energy generated by your solar panels. Consider your energy needs and select the appropriate battery type and size.
- Inverter: This converts the DC power generated by the solar panels into AC power for your RV’s appliances. Familiarize yourself with different types of inverters before making a choice.
- Mounting hardware: Choose a mounting system that suits your RV’s roof type.
- Wiring and connectors: Purchase the necessary wiring, connectors, and fuses to link your solar system components.
Take a look at our helpful guide on: How Much Solar Power Do I Need For My RV?
A Step-by-Step Guide to Installing Solar Panels on Your RV
Step 1: Plan Your Solar Array Layout
First, measure your RV’s roof and decide on the best arrangement for your solar panels. Keep in mind that you’ll want to avoid shading and maximize sun exposure. Consider tilting the panels to increase efficiency.
Step 2: Install Mounting Hardware
Attach the mounting hardware to your RV’s roof according to the manufacturer’s instructions. Be sure to use proper sealant to prevent leaks.
Step 3: Mount the Solar Panels
Carefully attach the solar panels to the mounting hardware. Make sure they are secure and properly aligned. If using a tilting mount, test the tilting mechanism to ensure it operates smoothly.
Step 4: Install the Charge Controller
Find a suitable location for the charge controller, preferably near the battery bank. Mount it securely and ensure that it is easily accessible for monitoring and adjustments.
Step 5: Wire the Solar Panels
Connect the solar panels to the charge controller using the appropriate wiring and connectors. Follow the manufacturer’s guidelines for proper wire sizing and use fuses or circuit breakers as required. Ensure all connections are secure and watertight.
Step 6: Connect the Battery Bank
Wire the charge controller to the battery bank, taking care to observe the correct polarity. Make sure to use fuses or circuit breakers as recommended by the manufacturer.
Step 7: Install the Inverter
Mount the inverter in a well-ventilated area, close to the battery bank but away from any potential sources of moisture or heat. Connect the inverter to the battery bank using the appropriate wiring, and ensure that all connections are secure.
Step 8: Test Your Solar System
Once everything is connected, turn on the charge controller and inverter, then monitor the system to ensure that the solar panels are generating power and charging the batteries. If everything is working correctly, your RV should now be powered by clean, renewable solar energy!
Check out our article on: 12 Off-Grid RV Rigs: Models For Remote Camping
Maintenance and Troubleshooting
To keep your solar system running smoothly, perform regular maintenance and inspections:
- Clean the solar panels to remove dirt and debris that could reduce efficiency
- Check the mounting hardware for signs of wear or damage
- Inspect the wiring and connections for signs of corrosion or wear
- Monitor the charge controller and inverter for proper function and performance
If you encounter issues with your solar system, consult the manufacturer’s troubleshooting guide or contact a professional for assistance.
Additional Tips and Tricks
To help you make the most of your RV’s solar power setup, consider these helpful tips and tricks:
Tip 1: Monitor Your Energy Usage
Install an energy monitor(Amazon) to track your RV’s energy consumption. This will help you understand your power usage patterns and identify areas where you can conserve energy.
Tip 2: Optimize Your RV for Energy Efficiency
Upgrade to energy-efficient appliances and invest in LED lighting to reduce your RV’s overall energy consumption. This will allow your solar system to provide a greater portion of your energy needs.
Tip 3: Consider Adding a Solar Generator
A portable solar generator(Amazon) can serve as a backup power source for your RV or provide additional power for high-consumption devices like air conditioners.
Tip 4: Educate Yourself on Solar Power
Continuously learning about solar power technology, new products, and best practices will help you maintain and upgrade your system effectively. Online resources, such as solar power forums, can provide valuable information and support.
Tip 5: Seek Professional Help When Needed
If you’re unsure about any aspect of your solar installation or encounter problems you can’t resolve, don’t hesitate to consult a professional. A skilled solar technician can help ensure your system is functioning safely and efficiently.
Final Thoughts
As you embrace the solar-powered RV lifestyle, remember that patience and persistence are key. Installing and optimizing your solar system may be a learning process, but the rewards of clean, renewable energy are well worth the effort. With careful planning, regular maintenance, and a commitment to energy efficiency, you’ll soon be enjoying the freedom and self-sufficiency that solar power provides.
Good luck, and happy camping!
Check out our article on: Best Portable Solar Panels For RVs With Kits: (2023)

