
RVs have opened entirely new ways to holiday. Millions of Americans use their RVs to explore the wonderful country they live in and spend time with family in ways that hotels and Bed Breakfast accommodations don’t allow. Keeping your RV in good condition is very important.
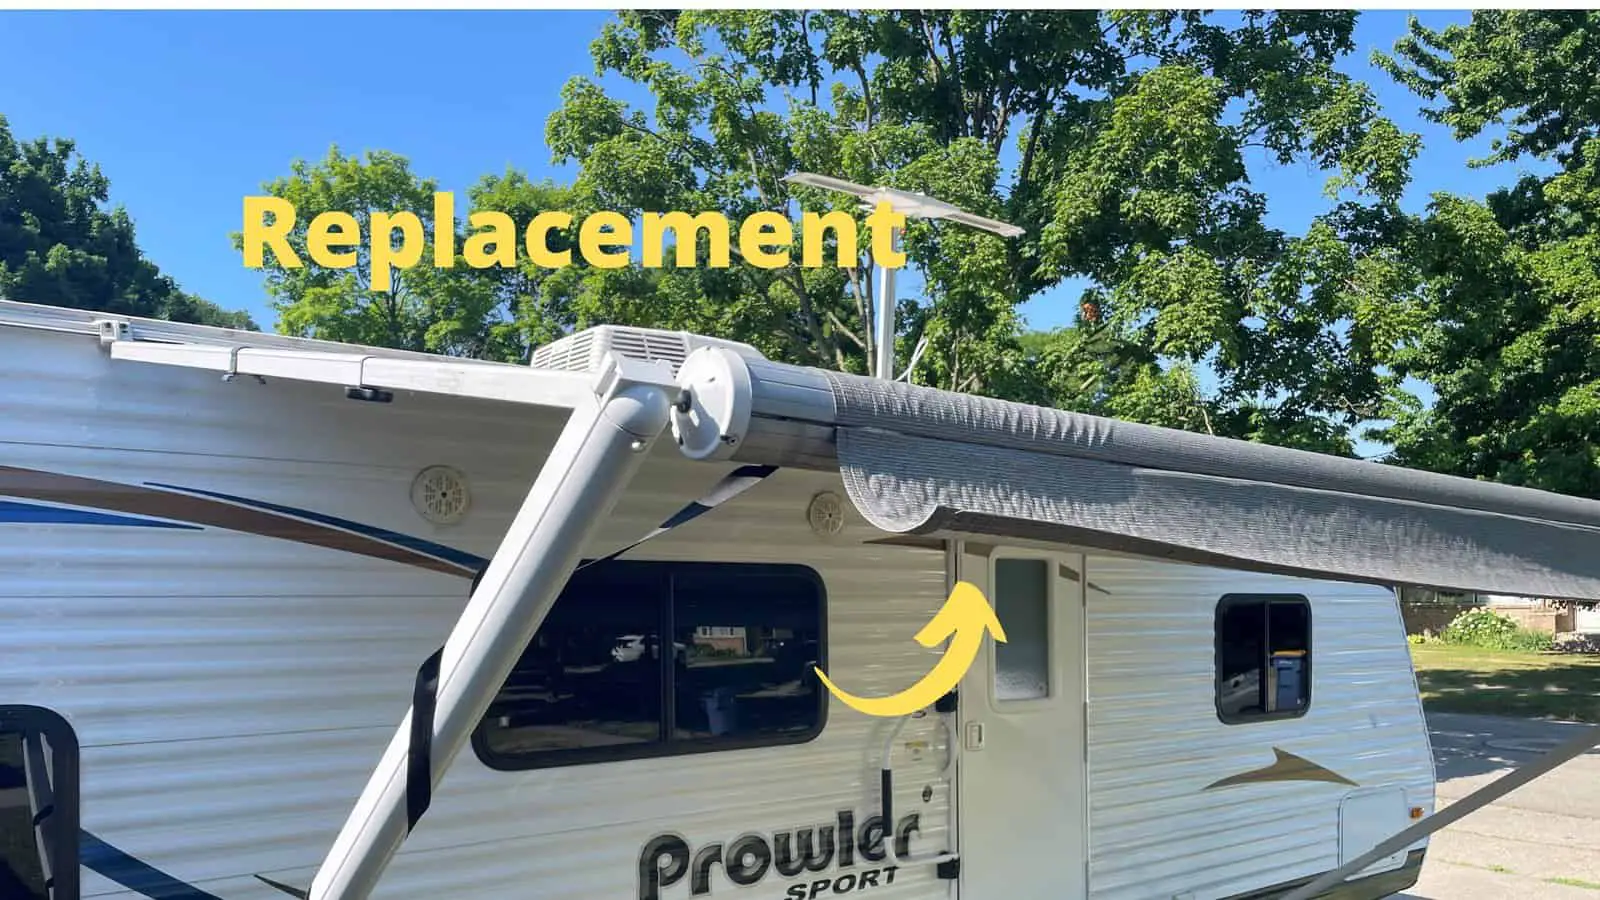
To replace your RV awning, follow these steps.
- Unwind the awning fabric.
- Remove the fabric.
- Take the fabric out of the roller tube.
- Prepare the fabric tracks.
- Fit the new fabric.
- Reinstall the fittings.
- Reinstall the retracting mechanism.
- Finish the assembly of RV awning fabric.
Trying to replace your RV awning by yourself may seem intimidating and something you should leave to the experts, but in reality, if you have all the tools you need and follow each of the steps, it is a job that most people can do.
Here Is How You Replace The Awning
It’s irritating to start a project only to find you need to stop and run backward and forwards for equipment to select before you commence. To make life easier, the following is a list of all the tools you will need to replace your RV awning.
Tools you need
- A straight pick
- A felt tip marker pen
- Masking tape
- Vice Grip Pliers
- Pop riveting gun
- 3/16th diameter rivets
- A tube of caulk
- Power drill
- Straight edge screwdriver
- File
- Silicon Spray
- Tape measure
- Two sturdy ladders (you can rent these)
- You may also need a hammer, Phillips’s screwdriver, a utility knife, and a wire cutter.
Follow The Steps Listed Below To Replace Your RV Awning
It is recommended that you follow the eight steps listed below to replace your RV awning successfully.
1. Unwind The RV Awning Fabric
Set the awning control to the roll-down position and extend the awning for a foot (30 cm) from its stored position.
Ensure the awning is extended so that the hole in the end cap points away from the RV.
Insert the straight pick through the hole in the end cap and the center rod. It will lock the spring in the roller tube and prevent the awning from retracting.
2. Remove The RV Awning Fabric
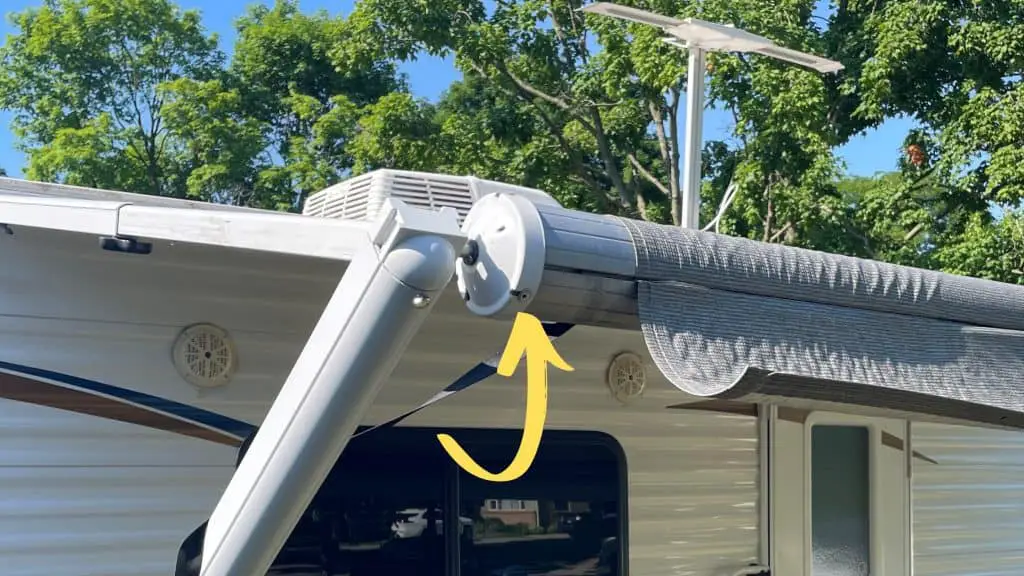
Unscrew the bolts which hold both end caps in place.
With the securing bolts removed and with help from a second person, lift the center rod out of the endcaps.
With each person back on the ground, carefully walk backward and unfurl the awning. Once the awing is fully extended, secure a vice grip onto the right-hand side bracket (using a soft cloth to protect the unit’s appearance.)
3. Take The Material Out Of The Roller Tube
Switch the retract latch to the roll-back position and turn the vice grip pliers clockwise to release the spring tension on the retracting mechanism. Make sure you count the number of turns needed to unwind the spring, as this will be the number you use when you re-tension it.
When the spring is fully unwound, take off the vice grips.
Drill out the existing rivets that hold the end clamp using the power drill.
Top Tip. When you have drilled out the first rivet, mark the hole on the center rod and the bracket to ensure you line this up correctly when you reassemble the unit. Drill out the remaining fasteners.
Once you have removed the rivets, slide the whole center spring mechanism out of the tube.
Mark which track is used for the valance and the awning.
With someone holding the awning on one side, another person can slide the center tube out of its track.
Slide the awning out of the track on the RV. There may be a bolt holding the RV awning in place, which you must remove before sliding the canvas out.
Remove the screws which hold the awning arm to the RV. Once the screws are removed, carefully take the awning arm off, ensuring it doesn’t fall against the RV and damage the side.
Now is the time to remove the awning from the RV. It is done by sliding it out of the track on the RV.
4. Prepare The RV Awning Fabric Tracks
Using the straight edge screwdriver, gentle pry the sides of the awning track apart to create a wider gap for the new awning to enter. Also, remove any debris blocking the opening of the RV awning track.
Using the file, carefully remove any aluminum burs or sharp edges which could cut into the new awning material.
Tape the corners at the opening of the awning track to protect the new material and prevent it from getting snagged when installed.
Spray the whole length of the track with silicone spray to lubricate the bead track and make it easier to slide the replacement awning in.
5. Fit The New RV Awning Fabric
It is easier if you have three people working on this process stage.
Have one person lift the awning from the ground and supply the edge to someone on a ladder positioned by the opening of the awning track.
The second person feeds the awning into the track.
The third person will gently pull the awning along the track while the second person continues to feed the new canvass into the track opening.
6. Reinstall The Fittings Of The RV Awning
Once the new awning is completely installed into the track, you can reinstall the awning arm which you previously removed. Click the awning arm into its catch bracket at the bottom, then reinstall the screws which secure the top arm bracket.
Before fitting the screws, make sure you liberally smear them with caulk to ensure no water leaks into these holes.
The material you purchase as the replacement awning will have a bead core installed on the edge to which the center rod will be attached. Hopefully, the bead core will stick out from each side by approximately an inch (2.5 centimeters).
If too much bead core sticks out, you can cut these to length using the wire cutter.
Spray liberal quantities of the silicon spray into both tracks on the roller tube.
With someone holding the roller tube, start to feed the bead core into each track, ensuring that the valance and awning are installed in the correctly marked bead tracks.
Once both fabrics are started in the bead tracks, pull the rest through until fully installed in the roller tube.
7. Reinstall The Retracting Mechanism And End Cap
Remember, when you separated the end cap from the roller tube, you marked the position of the endcap holes against the roller tube holes. Make sure you line these markings up, so the endcap has the correct orientation.
Using the pop rivet gun, install new rivets into each hole to secure the cap in place.
Turn the awning control to the roll-down position and reattach the vice grip pliers.
Turn the vice grip in the opposite rotation to that you used when releasing the tension. Turn the vice grip for the same number of turns as when you removed the spring tension.
If your awning was having trouble retracting previously, add a few more tensioning turns, which should fix this problem.
Make sure that the orientation of each bracket on either side of the roller tube is the same.
8. Finishing The Assembly Of RV Awning Fabric
Ensure the awning fabric is centered.
Measure the distance between each awning arm and the edge of the awning fabric. If different, pull the awning along the RV track until there is an equal distance on each side.
Repeat this process on the roller tube.
With two people on ladders at each end, carefully roll the awning up on the roller tube, making sure that you release the arms from their securing points as you roll up the material. Leave one foot (30 cm) length of awning away from the RV at the top.
Fit the awning arms to each side of the roller tube and ensure that the retaining bolt(s) is securely fastened.
With both installers holding each side of the roller tube, remove the straight pick from the end cap. It will release the left spring and allow the roller tube to retract against the side of the RV.
Don’t worry if the roller arms do not align perfectly, as you can adjust these by loosening the retaining bolts and sliding the roller tube left or right until it is in alignment.
Furl and unfurl the awning a few times to ensure the material winding is smooth without any creases.
Once you are happy it is aligned and the action of the awning is correct, reposition the set screw(s) into the RV awnings track to prevent the RV awning from moving backward or forwards along the bead track.
Congratulations, you have replaced your RV’s awning.
How Do You Measure For A New RV Awning
Take the following steps to ensure that you order the correct size awning.
- Measure the longitudinal distance (length across the RV) between the inside of each end cap.
- Measure from the centerline of the left arm to the centerline of the right arm.
- Measure the length of the RV awning, which fits into the RV camper’s awning bead.
These should be identical distances, and if there are any variances, the awning arms or attachment points may have worn and are out of alignment.
The awning width should be ten inches (25 centimeters) less than the gap between the awning arms. The measurement needs not be inch-perfect; it is suggested that you round up to the nearest foot when ordering the new material.
For example, if the measurement of the distance between the arms is 16 feet (4.8 meters), then you will need to order a 15-foot (4.5 meters) awning fabric. Check what widths the awning fabric supplier can provide, as the widths often cannot match your exact dimensions. For a 16-foot awning, the actual width of the fabric may be between 15’1 feet (4.6m).
Discussing your option with the supplier will ensure you receive a suitably sized awning.
It is easier to order the fabric from a supplier who works with the RV market.
It will ensure that the dimensions are fully understood, and the manufacturer fully installs the bead cores.
When choosing a supplier of the replacement RV awning, please do some research and find out the quality of their product. You don’t want the stitching to be low quality and to start to come undone after a short time.
How Long Will Canvass Awnings Last?
Depending on your RV’s use frequency, the awning may need to be replaced every 5 to 15 years.
Factors that affect an RV’s awning durability are
- The type of weather conditions the RV awning is exposed to.
- Excessive exposure to the sun’s UV rays cause, Discoloration, Fading, Cracking/Tearing, Brittleness.
- How often do you use the RV?
- How long the awning is exposed to the elements.
- Where is the RV stored? Is it in a covered or enclosed area, or is it left out in the open?
The Signs That An RV Awning Is Ready To Be Replaced Are
The RV Awning Material Begins To Crack
If cracks appear in the RV awning material, it is probably time to replace it. Cracking of the material will show that the material is losing its elasticity. Although you can try to patch these,
inevitably, the awning will ultimately need to be replaced.
The Seams Stitching Of The RV Awning Become Compromised
When you inspect the stitching which holds the bead core in place, and any other seams become loose, the end is near.
These seams are structural and ensure the RV awning stays attached while driving at higher speed, with corresponding wind stresses, and at the campsite in the middle of a storm.
You don’t want these to fail because it will probably bend the awning arms, damage the roller tube, and overstress the bead tracks on the side of the RV.
One of the main differences between high-quality awnings and lower-cost products is the quality of the stitching and the durability of the stitching material.
Stains Show On The RV Awning And Are Difficult To Remove
Many different things can cause stains in an awning. You may have parked in a dusty venue, and wind caused dirt stains to appear, and then the rain turned it into the mud, with the result being a mud-stained RV awning.
Fabric awnings tend to dry, which helps prevent mildew before it has a chance to set in. Sometimes mold does develop, and removing it from fabric is complex and, in some cases, impossible.
The most effective way of preventing mold and mildew is to ensure the awning is completely dry before rolling it up. Even if the RV awning is rolled up, mold will inevitably find a way in if the RV is stored in a damp space.
Holes And Tears Start To Appear In The RV Awning
If holes and tears start to form, it may be because of the material aging.
You can try to repair these, which will extend the life of the awning for a little while, but a new RV awning is in your future.
Conclusion
RV awnings are susceptible to wear and tear and need to be replaced after constant use for several years. It is a job you can do yourself, and if you carefully follow the necessary steps and get help from a few people, it is a painless process.
Looking at your nice shiny new awning, which you installed, is an incredibly satisfying experience. Even if you think you are ham-fisted, carefully follow the instructions, and you will successfully replace your RV awning.
Good luck, and happy camping!
Check out our article on: How To Clean An RV Awning (6 Easy Steps)